
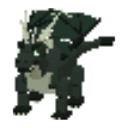
Level 165 boss · 101,210 health · Aggressive · The Hollow Crown
Boss respawns
Defeated bosses return at :00, :15, :30 and :45 each hour. Living bosses stay alive; the clock does not reset fights. Each lair keeps its own boss.
Where to find it
The Hollow Crown, at (6208, -5728) on central Northreach Isle: an open basalt arena surrounded by broken crypt stones and lava. Four clear paths lead in and out. PvP stays active throughout the encounter.
The Hollow Crown among the dragons’ lairs →
Health and boss warnings
Warning attacks and hazards hit for a fixed amount: a share of the warning health of a character of your training at this boss’s level, 165. That is Knight 1,370, Ranger 1,235, Mage 959. It does not grow with your own health: above level 165 the same blow takes a smaller part of your health, and below it a bigger one, a whole health bar or more far below. Every boss is meant to be fought at its own level or above, in armour to match; a group of low levels cannot outlast it on numbers alone.
The warning and hazard percentages below are of this warning health, before any armour reduction. Fixed bites and close blows still use their listed damage.
The fight in numbers
- Health: 101,210.
- Its bite: 62–176 damage every 2.2 seconds, before your armour and shield.
- Armour 33 · Defence 40.
- Its breath costs 47–58% of your warning health if you stand in it (Knight 643–794, Ranger 579–716, Mage 450–556 damage): armour takes only a little off this warning attack.
How the fight goes
- It wakes. Come within 9 tiles of it and it roars: everyone within 20 tiles sees its health bar and hears the music. It turns on whoever has hurt it most lately (healing a friend counts half as much).
- Watch the ground. Every 8–12 seconds it winds up a signature attack, and the tiles it will strike light up first, for about 1.2–1.7 seconds. Step off them before it strikes. Its breath fills a cone 12 tiles long in front of it, with 1.7 seconds to move from the fixed warning tiles. Against distant fighters it alternates that breath with a fireball marking a fixed three-by-three area for 1.3 seconds before impact. Beyond breath range, a fighter in clear sight can still draw that fixed fireball warning; distance alone does not silence its specials. Occasionally it scatters a volley at up to three distant active fighters, even while another player holds its attention. These fixed three-by-three marks give 1.7 seconds to dodge; a nearby extra patch can accompany a lone fighter’s mark. Overlapping blasts from one volley only hit you once. Its tail sweeps the tiles behind and beside it (33–41% of your warning health); a gust blows everyone within 3 tiles back two tiles; a stomp sends a shockwave out in two rings, the near one and then the outer one (30–39%).
- It hunts whoever strikes from afar. On the ground in its fight it moves 6% slower than whoever it goes after, but every 8–12 seconds, at no set beat, it rears up, snaps its wings and roars, and 0.6 seconds later surges after them for 1.4 seconds, far faster than anyone walks. After a surge, or a bite, it tires for a moment: keep moving, step away when it rears, and you can open the distance again. Every 5–9 seconds, at no set beat, it may turn on someone who has been striking it from beyond its bite: it leaps at them, and the ground beside them where it will land lights up for 1.3 seconds first (30–37% of your warning health), then it keeps after them for 4 seconds. Out of reach of a leap, it hurls a fireball at them instead. With someone fighting it blade to blade it does this far less often, and a blade’s hurt angers it 1.75 times as much as an arrow’s or a spell’s.
- Its floor burns. Every 2.2–3.5 seconds, at no set beat, patches of its floor catch fire, most often beside whoever fights it or where they are heading. Each is outlined in pale green for 1.5 seconds before it burns, then burns for 4–6.5 seconds, and some creep on a tile or two as they go out. Only a burning tile hurts: 13–17% of your warning health as it catches, then 11% a second while you stand in it. From anywhere on its floor there is always a tile clear of fire within 2 steps.
- Its arena is its own. It stays within the marked basalt arena. The four paths lead out of its reach, but player combat remains possible beyond the arena. It takes to the air once a fight: come back before it has healed to full and it does not take off again.
- At two thirds of its health it takes to the air for about 8 seconds: swords cannot reach it, but arrows and spells still can. Every 2.4 seconds it drops a fireball on each of you, lighting up a rounded five-tile-wide area where you stand (28–35%), and it lands with a slam where it comes down (35–41%).
- At a third of its health it is enraged: its bites come a quarter faster, and its signature attacks every 6–8.5 seconds.
- The lair fights too. Six cracks in the floor glow for 1.6 seconds and then burst, every 9 seconds: 8–10% of each fighter’s warning health.
- If everyone leaves or falls, it heals back to full after a short breather.
The first time you join a boss fight the game tells you the one thing to know: when the ground under you lights up, step off it. Bring food and potions, and friends: healing them counts as helping.
Loot: one shared hoard
Deal at least 3% of the boss’s full health in contribution to qualify. Damage counts, plus effective healing you give other fighters for injuries caused by this boss. Self-healing, unrelated damage and PvP injuries cannot earn healing credit. Healers can also qualify through effective healing and Shelter protection: help at least three times over ten seconds, restoring or preventing 1% of the boss’s health, capped at twice your maximum health. Only help given to other fighters counts. Stay active in the encounter.
Every ordinary drop and the additional equipment roll is rolled once per kill. Coins and other stacks are divided by contribution; single items, Legendary and Mythic finds too, are awarded by contribution-weighted chance. The denominator includes all fighters’ work, including those below the qualifying threshold; their portion is not redistributed. A fighter contributing 3% therefore earns about 3% of a solo kill’s expected reward, not a full extra loot roll. A larger group does not create a larger hoard.
Credit survives a disconnect or death until the encounter resets. Your awarded items remain reserved for you for 10 minutes beside the defeated boss. Experience comes from one shared pool, divided by damage and effective healing of injuries caused by this boss. Oathbound characters may join boss fights and collect only their own earned shares; their trading and outside-healing restrictions still apply.
One shared rare reward
Vaelthar can award at most one Legendary or Mythic item per defeat. Each of the seven Wraithveil equipment pieces has a final 1 in 165 chance; its exclusive amulet has a final 1 in 2,000 chance. Tempering Stones share that same exclusive pool. Adding participants never adds extra rolls.
Possible drops
- Bones · 1 · 81% once per kill, shared by contribution
- Gold coins · 3600–7600 · 81% once per kill for the whole hoard, divided among eligible contributors
- Raw meat · 9–16 · 72.9% once per kill, shared by contribution
- Dragon blood · 1–2 · 48.6% once per kill, shared by contribution
Legendary and Mythic finds, rolled once a kill for one fighter:
- Wraithveil blade · 1 · 0.606% per kill
- Wraithveil cape · 1 · 0.606% per kill
- Wraithveil helm · 1 · 0.606% per kill
- Wraithveil cuirass · 1 · 0.606% per kill
- Wraithveil greaves · 1 · 0.606% per kill
- Wraithveil boots · 1 · 0.606% per kill
- Wraithveil shield · 1 · 0.606% per kill
- Wraithveil amulet · 1 · 0.05% per kill
- Tempering Stone · 1 · 0.203% per kill
Additional equipment roll · 24 possible items
One extra roll can give at most one piece from this list, independently of the drops above. These are the full chances once per kill, shared by contribution, not the odds after winning an equipment roll. A named drop and this roll can both give the same item.
- Iron sword · 1 · 1.947% once per kill, shared by contribution
- Iron axe · 1 · 0.649% once per kill, shared by contribution
- Iron helmet · 1 · 1.004% once per kill, shared by contribution
- Iron shield · 1 · 0.606% once per kill, shared by contribution
- Iron chainmail · 1 · 0.061% once per kill, shared by contribution
- Iron greaves · 1 · 0.061% once per kill, shared by contribution
- Steel sword · 1 · 0.885% once per kill, shared by contribution
- Steel axe · 1 · 0.295% once per kill, shared by contribution
- Steel helmet · 1 · 0.456% once per kill, shared by contribution
- Steel shield · 1 · 0.275% once per kill, shared by contribution
- Steel chainmail · 1 · 0.028% once per kill, shared by contribution
- Steel greaves · 1 · 0.028% once per kill, shared by contribution
- Silver sword · 1 · 0.283% once per kill, shared by contribution
- Silver axe · 1 · 0.094% once per kill, shared by contribution
- Silver helmet · 1 · 0.146% once per kill, shared by contribution
- Silver shield · 1 · 0.088% once per kill, shared by contribution
- Silver chainmail · 1 · 0.009% once per kill, shared by contribution
- Silver greaves · 1 · 0.009% once per kill, shared by contribution
- Gold sword · 1 · 0.089% once per kill, shared by contribution
- Gold axe · 1 · 0.03% once per kill, shared by contribution
- Gold helmet · 1 · 0.046% once per kill, shared by contribution
- Gold shield · 1 · 0.028% once per kill, shared by contribution
- Gold chainmail · 1 · 0.003% once per kill, shared by contribution
- Gold greaves · 1 · 0.003% once per kill, shared by contribution
Ordinary items, coins and rare finds come from one shared hoard. Contribution determines your share or your chance to receive a single item; the 3% threshold grants eligibility, not a full extra roll. Drop rolls are chances, not a promise per trip. Defeat it to record it in your in-game Creature Journal.