
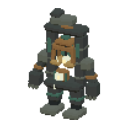
Level 130 boss · 75,210 health · Mourning Isle · No player combat
Boss respawns
Defeated bosses return at :00, :10, :20, :30, :40 and :50 each hour. Living bosses stay alive; the clock does not reset fights. Each lair keeps its own boss.
Where to find it
A broken lighthouse stands on Mourning Isle at -176, 9120, far out in the southern sea. Sail south through the outer seas to its dark shore. Dead trees and worn stones surround the open arena. Players cannot attack each other anywhere on this island. The guardian remains dangerous. Buildings, claims, ground changes and Bank Box are kept off the island so everyone can use its approaches.
Health and boss warnings
Warning attacks and hazards hit for a fixed amount: a share of the warning health of a character of your training at this boss’s level, 130. That is Knight 845, Ranger 755, Mage 589. It does not grow with your own health: above level 130 the same blow takes a smaller part of your health, and below it a bigger one, a whole health bar or more far below. Every boss is meant to be fought at its own level or above, in armour to match; a group of low levels cannot outlast it on numbers alone.
The warning and hazard percentages below are of this warning health, before any armour reduction. Fixed bites and close blows still use their listed damage.
A grounded guardian
75,210 health · Armour 28 · Defence 34. Its close blows deal 58–156 damage before your defences. The bell’s light and tolls take a share of your warning health, reduced a little by armour. The guardian stays grounded throughout the encounter.
- Searching Light: a straight lane locks onto the ground for 1.9 seconds. Step sideways before it strikes for 32% of warning health.
- Mourning Toll: the bell rises and the floor warns for 4.5 seconds. Stand on the marked shelter tiles behind one of the four stones; exposed tiles take 38% of warning health. The safe side faces away from the beacon.
- Lost Lights: below 65% health, two Lost Lights can begin returning to the bell. Destroy both within 14 seconds to expose its core for 5 seconds, increasing damage dealt by 25%. Failure triggers a separate 2 seconds warning before a 27% blast.
- The final phase: below 30%, familiar attacks come more frequently. Warning times remain the same.
Fight on foot inside the arena. Boats, cliffs and attacks from beyond its boundary cannot be used to farm the guardian. Leave through any approach to retreat. If every fighter leaves or falls for 10 seconds, the encounter resets. After defeat, it can return at the next :00, :10, :20, :30, :40 or :50.
One hoard, earned by contribution
Reach 3% of its full health in contribution to qualify. Damage dealt and legitimate healing of other fighters count; Lost Lights add a bounded amount of objective credit. Healing PvP or other unrelated injuries gives no credit. Your expected share scales with your contribution, and adding fighters does not multiply the reward pool.
One kill rolls 3600–6000 coins, 8–12 gold ore, 12–18 silver ore and 24–36 coal for the whole encounter, with an independent 90% chance for each stack. The Beacon core has a one-in-32 chance per kill and gives each qualifying fighter a contribution-weighted chance to receive it. Work below the threshold remains in the denominator and its portion is left unclaimed. It can be built into a Last Beacon trophy. Legendary equipment is likewise rolled once per kill and awarded by contribution; there is no new Mythic tier.
Burning oil
Every 2.9–4.7 seconds, at no set beat, patches of the floor turn to burning lamp oil, most often beside whoever fights it or where they are heading. Each is outlined in amber for 1.5 seconds first, then lasts 4–6.5 seconds. Only a tile that has turned hurts: 8–11% of your warning health as it turns, then 7% a second while you stand in it. From anywhere on the floor there is always a clear tile within 2 steps (never in the shelters behind the standing stones).
Back-line adds
During the fight, drowned shades climb out of the dark towards its light: every 15–19 seconds (alone, every 24–30 seconds), beside randomly chosen fighters, including those in melee. The spots are framed on the ground for 1.7 seconds before they rise.
Alone, one comes at a call and at most 2 are about at once; with two or three fighters, 2 (at most 4); with four or more, 3 (at most 6).
Each bites for 3.5–4.5% of your warning health every 1.5 seconds and crumbles after 16 seconds, or at once when the boss falls or its fight ends. They give no loot, experience, coins or Journal entry and count for no hunting contract, quest or achievement. They fight back, so they build Rage and Focus.
Collect at the plinth
After the fight, stand within 3 tiles of the central plinth, on foot and out of combat, and choose Collect rewards. Your earned XP, Journal credit and items wait there through death, logout and server restarts. XP and Journal credit can be collected even with a full bag; items that do not fit remain for a later collection. Rewards never expire and cannot be collected twice. Oathbound fighters may collect their own earned shares.
Possible drops
- Gold coins · 3600–6000 · 76.95% once per kill for the whole hoard, divided among eligible contributors
- Gold ore · 4–6 · 76.95% once per kill, shared by contribution
- Silver ore · 6–9 · 76.95% once per kill, shared by contribution
- Coal · 12–18 · 76.95% once per kill, shared by contribution
- Beacon core · 1 · 3.078% once per kill, shared by contribution
Legendary finds, rolled once a kill for one fighter:
- Starforged sword · 1 · 0.261% per kill
- Starforged greatsword · 1 · 0.261% per kill
- Starforged bow · 1 · 0.261% per kill
- Starforged staff · 1 · 0.261% per kill
- Wardenplate helm · 1 · 0.464% per kill
- Wardenplate cuirass · 1 · 0.464% per kill
- Wardenplate greaves · 1 · 0.464% per kill
- Wardenplate shield · 1 · 0.464% per kill
- Wardenplate boots · 1 · 0.232% per kill
- Tempering Stone · 1 · 0.128% per kill
Ordinary items, coins and rare finds come from one shared hoard. Contribution determines your share or your chance to receive a single item; the 3% threshold grants eligibility, not a full extra roll. Drop rolls are chances, not a promise per trip. Defeat it to record it in your in-game Creature Journal.