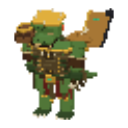
Level 100 boss · 8,546 health · Sarrath, the Drowned Fens · Small group recommended
Boss respawns
Defeated bosses return at :00, :10, :20, :30, :40 and :50 each hour. Living bosses stay alive; the clock does not reset fights. Each lair keeps its own boss.
The Brood Temple
Ssarvek keeps the top of the Brood Temple at the heart of Sarrath, the Fenscale city in the western Drowned Fens, at (-1841, 1292). Climb the stair on its south face. Fenscale warriors and mire-seers guard the temple and join any fight near them.
The fight
The level 100 Brood-Chief has 8,546 health and fights with a great bronze cleaver. Below four tenths of its health it roars and its wounds begin to close: a blow stops it. After defeat, it returns at the next :00, :10, :20, :30, :40 or :50.
Back-line adds
During the fight, he calls hatchlings out of the brood nests: every 15–19 seconds (alone, every 24–30 seconds), beside randomly chosen fighters, including those in melee. The spots are framed on the ground for 1.7 seconds before they rise.
Alone, one comes at a call and at most 2 are about at once; with two or three fighters, 2 (at most 4); with four or more, 3 (at most 6).
Each bites for 3.5–4.5% of your warning health every 1.5 seconds and crumbles after 16 seconds, or at once when the boss falls or its fight ends. They give no loot, experience, coins or Journal entry and count for no hunting contract, quest or achievement. They fight back, so they build Rage and Focus.
Possible drops
- Bones · 2–3 · 76.95% once per kill, shared by contribution
- Gold coins · 180–260 · 76.95% once per kill for the whole hoard, divided among eligible contributors
- Greater health potion · 1–2 · 46.17% once per kill, shared by contribution
- Greater mana potion · 1–2 · 46.17% once per kill, shared by contribution
- Fenscale hide · 1–2 · 76.95% once per kill, shared by contribution
- Brood-Chief's sinew · 1 · 8.333% once per kill, shared by contribution
Legendary finds, rolled once a kill for one fighter:
- Starforged sword · 1 · 0.174% per kill
- Starforged greatsword · 1 · 0.174% per kill
- Starforged bow · 1 · 0.174% per kill
- Starforged staff · 1 · 0.174% per kill
- Wardenplate helm · 1 · 0.051% per kill
- Wardenplate cuirass · 1 · 0.051% per kill
- Wardenplate greaves · 1 · 0.051% per kill
- Wardenplate shield · 1 · 0.051% per kill
- Wardenplate boots · 1 · 0.026% per kill
- Royal gold helmet · 1 · 0.051% per kill
- Royal gold chainmail · 1 · 0.051% per kill
- Royal gold greaves · 1 · 0.051% per kill
- Royal gold shield · 1 · 0.051% per kill
- Royal gold armoured boots · 1 · 0.026% per kill
- Wildstalker hood · 1 · 0.132% per kill
- Wildstalker jerkin · 1 · 0.132% per kill
- Wildstalker chaps · 1 · 0.132% per kill
- Wildstalker boots · 1 · 0.066% per kill
- Starweave cowl · 1 · 0.132% per kill
- Starweave robe · 1 · 0.132% per kill
- Starweave skirt · 1 · 0.132% per kill
- Starweave boots · 1 · 0.066% per kill
- Tempering Stone · 1 · 0.077% per kill
Ordinary items, coins and rare finds come from one shared hoard. Contribution determines your share or your chance to receive a single item; the 3% threshold grants eligibility, not a full extra roll. Drop rolls are chances, not a promise per trip. Defeat it to record it in your in-game Creature Journal.